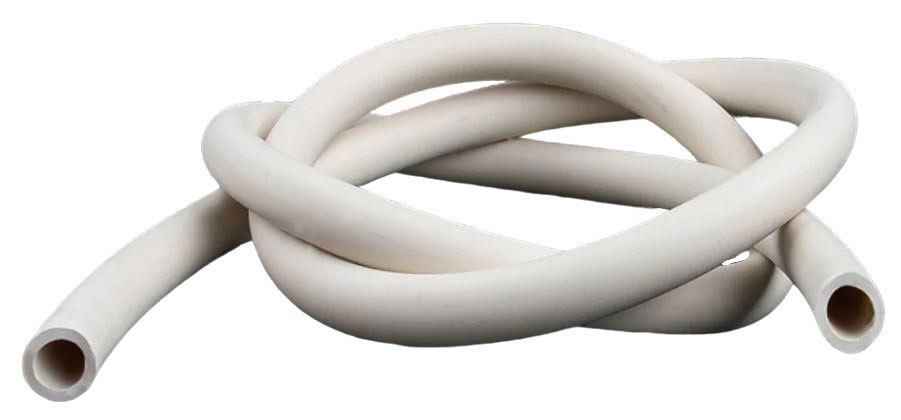
Tubing is a critical component in many fluid handling systems, from benchtop lab setups to high-throughput biopharmaceutical manufacturing. Tubing must perform reliably under repeated mechanical stress and challenging chemical conditions when used in peristaltic pumps or sterile fluid transfer processes. Knowing when to replace your tubing is essential to maintaining flow integrity, ensuring product quality, and avoiding costly downtime or contamination.
General Tubing Lifespan Factors
Tubing degradation depends on multiple variables beyond just time in service. These include:
Tubing material and chemical compatibility
Types of media being transferred, such as acids, solvents, proteins, or buffers
Temperature and pressure extremes
Pump mechanics (e.g., occlusion settings, cycle speed)
Wall thickness and tubing ID/OD
Cleaning/sterilization protocols and frequency of use
Because each application has different performance demands, a visual inspection alone may not be enough to determine tubing condition, especially in critical workflows.
Signs It's Time to Replace Tubing
1.Visible Wear and Tear
Start with a simple visual inspection, as many early signs of tubing failure are seen with the naked eye. When tubing has reached or exceeded its service life, physical damage is often the first and most obvious indicator. Look for:
Cracking or crazing on the surface
Hardening or loss of flexibility
Discoloration or cloudiness
Kinks, flattening, or permanent deformation
Stretching or ballooning under pressure
2.Changes in Pump Performance
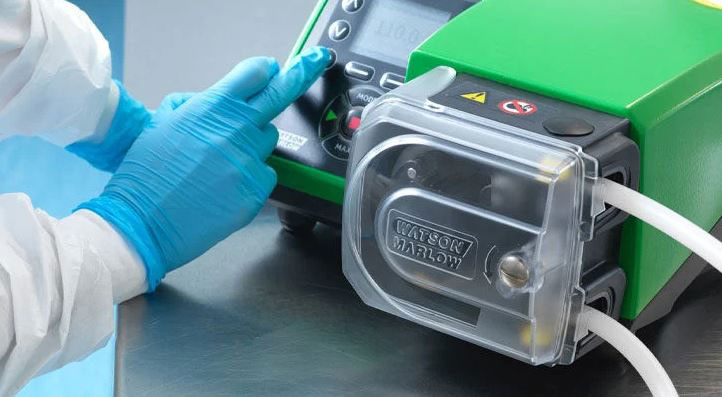
Even if tubing appears intact, changes in your system's operation can signal hidden wear. In peristaltic pump setups, tubing degradation directly affects flow consistency and pump efficiency. Common warning signs include:
Flow rate inconsistency or drop in volume
Excessive pulsation or vibration
Tubing slipping from the pump head rollers
Unusual noise during operation
These symptoms suggest that the tubing no longer responds to compression as designed.
3.Chemical Degradation
Chemical exposure can weaken tubing even before visible changes appear. If you're working with aggressive solvents, acids, or biological reagents, your tubing may degrade from the inside out. Signs of chemical breakdown include:
Swelling or shrinking after extended exposure
Softening or embrittlement
Leaching, which can contaminate fluids
Odor, sticky residue, or film on the tubing surface
Routine use of compatibility charts and performing immersion testing can help anticipate and prevent degradation from specific chemicals.
4.Microbial or Particulate Contamination
Contamination is a significant risk in sterile, high-purity, or regulated processes, and tubing is a common source. If you notice irregularities in product appearance or process data, inspect the tubing for:
Biofilm formation inside tubing walls
Cloudiness or foreign particulates in the fluid
Residual buildup that doesn’t clear during cleaning
Once contamination is detected, immediate tubing replacement is the safest course of action.
5.Operational Indicators
Not all signs of wear are visual or chemical; sometimes, the clearest indicator is operational data. If you follow a validated workflow or maintenance schedule, replacement may be based on system usage. Be aware of:
Exceeding the manufacturer’s recommended cycle life or operating hours
Scheduled preventive maintenance milestones
Drop in pressure or inconsistent readings from sensors
Validation protocols in biopharma requiring single-use or defined replacement intervals
Staying ahead of these markers helps ensure consistent results and minimizes downtime. Following SOPs and equipment logs ensures that tubing is replaced before failure occurs.
Immersion Test Procedure: Assess Tubing Compatibility with Your Media
While chemical compatibility charts offer a valuable starting point, real-world testing is often the best way to confirm how tubing will perform with your specific media under process conditions. That’s why conducting a hands-on immersion test before committing to a tubing material is important. By identifying how tubing responds to your actual chemicals and environmental conditions, you can reduce the risk of unexpected wear, ultimately helping you achieve longer tubing life, more consistent flow, and fewer system disruptions.
Follow the steps below to perform an effective compatibility test before putting tubing into continuous use:
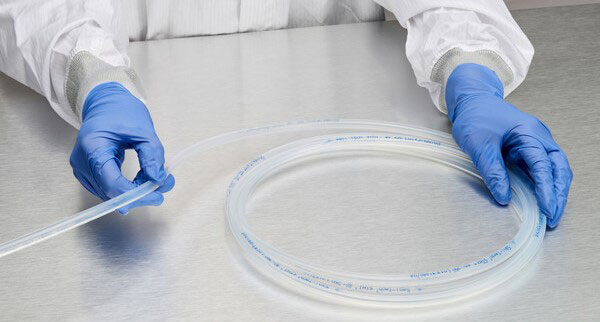
1. Sanitize Your Tubing Sample
Clean the tubing sample to remove any manufacturing residue or contaminants. This ensures that the test results reflect the tubing’s interaction with your process fluid, not external variables.
2. Measure and Document the Sample
Weigh the tubing sample and record its length and inner/outer diameter. This baseline data will allow you to detect any physical changes after exposure.
3. Immerse in Test Media
Place the tubing sample in a closed container filled with the actual fluid you plan to use. Seal the container and let the tubing soak for at least 48 hours to simulate extended exposure.
4. Re-Measure and Inspect the Sample
After soaking, weigh and measure the tubing again. Check for signs of chemical degradation, such as:
Significant changes in weight and measurements
Swelling or shrinking
Softening or embrittlement
Cracking, discoloration, or surface tackiness
These are all indicators that the tubing may not be suitable for your application.
5. Simulate Operating Conditions
Before full implementation, run the tubing in your system under actual process conditions, including temperature, pressure, vacuum levels, and pump speed. This real-use simulation helps confirm whether the tubing will perform consistently and reliably over time.
Completing an immersion test can avoid costly product loss, contamination, or downtime due to tubing failure, especially in applications with aggressive chemicals or tight performance specifications.
Best Practices for Tubing Replacement
Schedule regular inspections and replacements as part of preventive maintenance.
Document tubing usage, especially in regulated workflows.
Train personnel to recognize early signs of failure.
Use compatibility databases to evaluate tubing-media interactions.
Conduct immersion testing to validate tubing performance with your specific chemicals and operating conditions prior to deployment.
Standardize part numbers and traceability for consistent sourcing and lot control.
Proactive replacement avoids unplanned downtime and ensures your processes stay compliant and efficient.
Tubing at Its Limits? Here's What to Do Next
Tubing may seem like a minor component, but its failure can have major consequences, especially in fluid-critical environments. By knowing the signs of wear, tracking usage, and following replacement best practices, you can avoid disruptions, ensure product quality, and protect your people and processes.
At Cole-Parmer, we offer a wide selection of tubing materials and formulations designed for peristaltic pumps, sterile workflows, and demanding chemical applications. Find a comprehensive range of tubing options from trusted brands like PharMed®, C-Flex®, Tygon®, and our own Cole-Parmer line, all backed by chemical compatibility data and technical support. For more insights on tubing selection and lifespan, visit our Tubing Compatibility Database or speak with a fluid handling expert today. Let us help you keep your fluid path flowing reliably from start to finish.
Frequently Asked Questions
Q: How often should laboratory tubing be replaced?
A: Tubing replacement frequency depends on usage, chemical exposure, temperature, pressure, and cleaning or sterilization cycles. Peristaltic pump tubing or flexible tubing exposed to harsh chemicals typically require more frequent replacement to prevent failure.
Q: What are the most common signs that tubing needs to be replaced?
A: Common signs of tubing wear include cracking, discoloration, swelling, loss of flexibility, and visible leaks. However, demands vary by application and visual inspection alone may not always reveal tubing hose degradation.
Q: Can worn tubing affect lab results?
A: Yes. Laboratory analysis tubing degradation can introduce contamination, inconsistent flow rates, and reduced accuracy. Using compromised tubing instead of contamination-free process tubing increases the risk of leachables or particulates entering the system, which can negatively impact data integrity and reproducibility.
Q: Is peristaltic pump tubing more prone to wear?
A: Peristaltic tubing is more prone to spallation and wear because it is repeatedly compressed during operation. This mechanical stress accelerates fatigue, making regular inspection and timely replacement critical to ensure long life peristaltic tubing performance.
Q: How to test chemical compatibility of tubing?
A: An immersion test helps determine whether laboratory tubing is chemically compatible with a specific fluid. To perform the test, submerge a small tubing sample in the chemical for 48 hours at operating temperature, then inspect it for swelling, cracking, discoloration, or loss of flexibility. Physical changes indicate the chemical may degrade the tubing materials and that a more chemical resistant tubing option should be considered.


